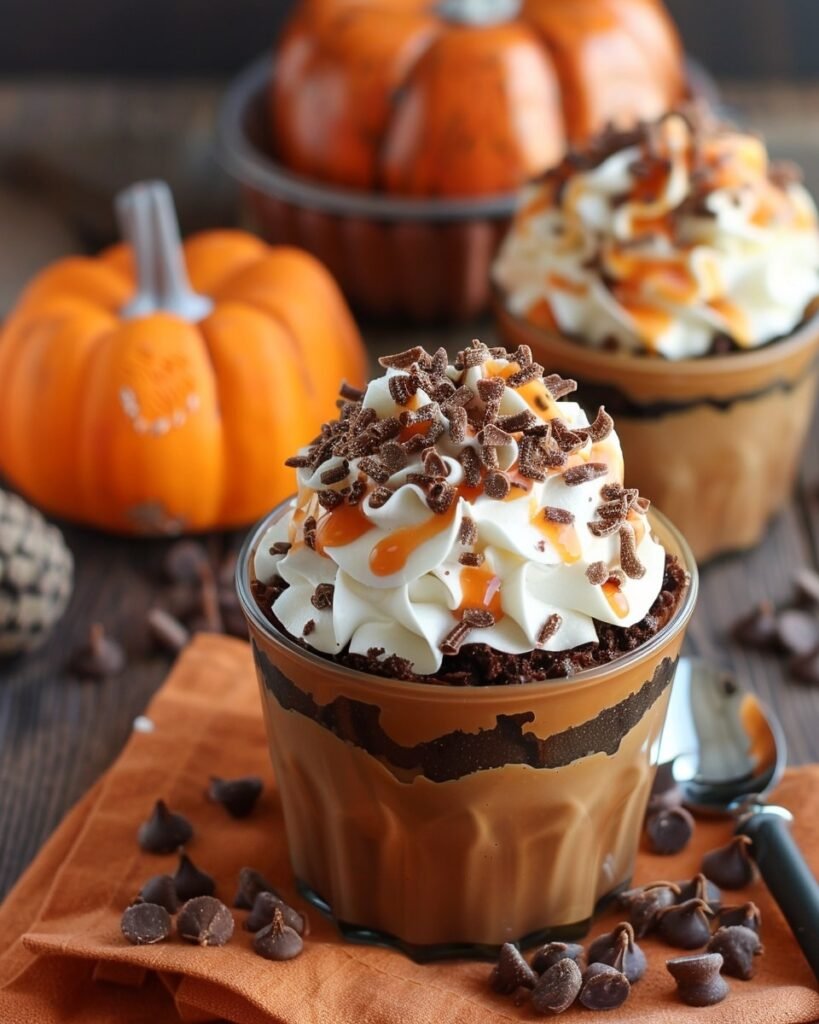
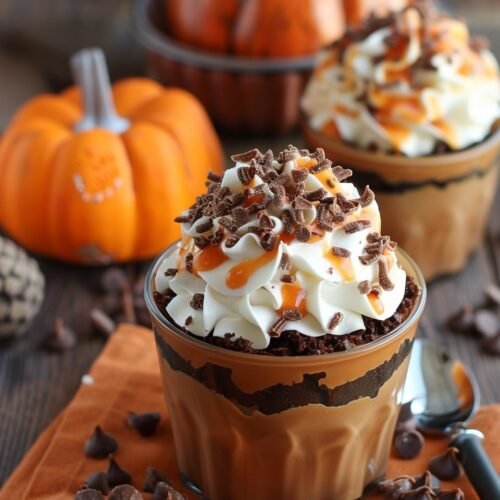
Festive Pumpkin Patch Dirt Cups Recipe
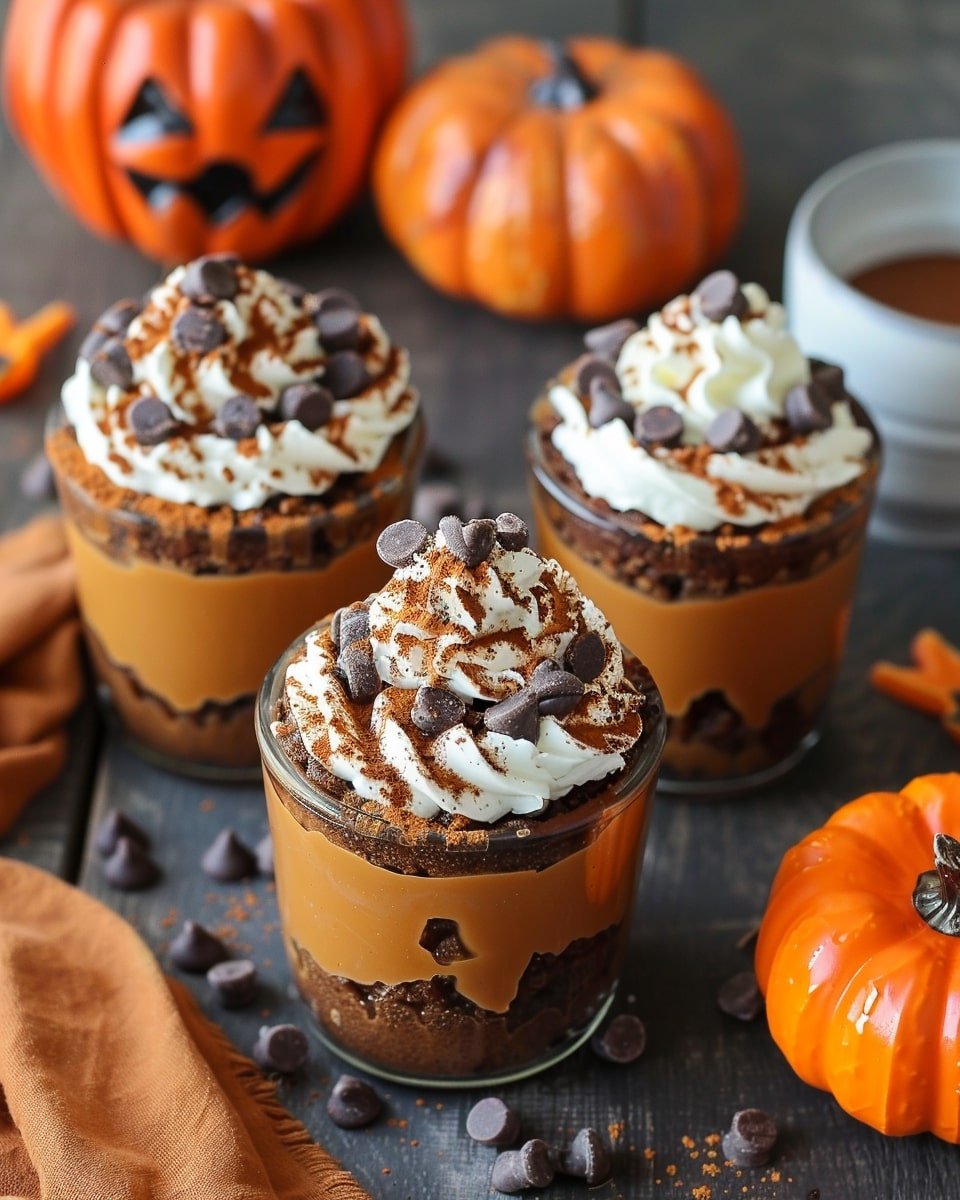
There’s something magical about Pumpkin Patch Dirt Cups desserts that go beyond taste and bring a little fun to the table. If you’ve ever had the joy of digging into a chocolate “dirt cup” as a child, you know how special these simple treats can be. Now, imagine giving that nostalgic dessert a festive fall twist with candy pumpkins, chocolate “soil,” and edible vines.
Why You’ll Love Pumpkin Patch Dirt Cups
-
Fun and Interactive – Decorating your own pumpkin patch is as enjoyable as eating it.
-
Kid-Friendly – Children can help crush cookies, layer pudding, and add candy pumpkins.
-
Quick to Make – No oven required; most of the work is assembling layers.
-
Perfect for Parties – Eye-catching presentation makes them a festive centerpiece.
-
Customizable – Adjust flavors, toppings, and decorations to fit your occasion.
Whether you’re preparing them for a classroom snack, a holiday gathering, or a cozy night in, you’ll love how much joy these cups bring.
Ingredients Needed for Pumpkin Patch Dirt Cups Recipe
Base & Layers
-
2 packs of instant chocolate pudding (or homemade pudding if you prefer)
-
3 cups of cold milk (for the pudding)
-
1 package of Oreo cookies (crushed into “dirt”)
Decorations
-
Candy pumpkins (like mellowcreme pumpkins or pumpkin gummies)
-
Green frosting, melted candy, or edible vines
-
Optional extras: sprinkles, candy worms, or crushed pretzels for texture
Serving Tools
-
Clear plastic cups, mason jars, or dessert glasses (to show off the layers)
-
Small spoons for serving
Step-by-Step Instructions for Making Pumpkin Patch Dirt Cups
Step 1: Prepare the Pudding Base
Start by whisking together the instant chocolate pudding and cold milk until smooth. Place it in the fridge for 5–10 minutes to thicken. If you prefer homemade pudding, cook it in advance and let it cool before layering.
Step 2: Crush the Cookies
Place the Oreos in a zip-top bag and crush them with a rolling pin. You don’t want them too fine leave some chunks so it looks more like real soil.
Step 3: Assemble the Layers
-
Spoon a layer of chocolate pudding into each cup.
-
Sprinkle a layer of crushed Oreos over the pudding.
-
Repeat until the cup is nearly full, ending with a top layer of cookie crumbs.
Step 4: Add Pumpkin Patch Decorations
Now comes the fun part. Press candy pumpkins into the “soil” so they stand upright. Use green frosting to pipe vines and leaves around the pumpkins. Add extra candy decorations for more personality worms crawling through the dirt or pretzel “fences” for a rustic touch.
Tips for the Best Pumpkin Patch Dirt Cups
-
Choose Clear Cups – Seeing the layers makes the dessert more exciting.
-
Assemble Close to Serving – While you can prepare ahead, add decorations just before serving so they stay fresh.
-
Let Kids Help – Crushing cookies and decorating cups are fun jobs for children.
-
Balance Flavors – If you want less sweetness, mix some whipped cream with the pudding for a lighter texture.
Creative Variations of Pumpkin Patch Dirt Cups Recipe
-
Pumpkin Cheesecake Dirt Cups – Blend softened cream cheese with pudding for a cheesecake-like filling.
-
Pumpkin Spice Dirt Cups – Add a dash of pumpkin pie spice to the pudding or whipped cream.
-
Gluten-Free Version – Use gluten-free chocolate cookies instead of Oreos.
-
Mini Pumpkin Patch Pots – Serve in mini terracotta pots (lined with parchment paper) for an authentic garden look.
How to Store Pumpkin Patch Dirt Cups
If you’re making them ahead:
-
Refrigerate the assembled cups for up to 2 days.
-
Add decorations last minute to keep them looking fresh.
-
Avoid freezing—the pudding and cookies won’t hold their texture once thawed.
Stored properly, these dirt cups will still look festive and taste delicious when served.
Serving Ideas for Pumpkin Patch Dirt Cups
These desserts are versatile and fit a variety of occasions:
-
October Party – Add gummy worms or candy eyes for a spooky vibe.
-
Thanksgiving Kids’ Table – A fun dessert kids can decorate themselves.
-
Fall-Themed Gatherings – Pair with apple cider or hot chocolate.
-
Family Weekend Activity – Let everyone design their own dirt cup.
FAQ
Can I make pumpkin patch dirt cups ahead of time?
Yes, you can assemble them a day in advance. Just add candy pumpkins and vines right before serving so they don’t lose their shape or freshness.
What type of pudding works best?
Chocolate pudding is the classic choice, but you can switch it up with vanilla, pumpkin spice, or even butterscotch for a twist.
Can I make pumpkin patch dirt cups without Oreos?
Definitely. Substitute with chocolate graham crackers, crushed brownies, or gluten-free cookies.

How do I keep the cookies crunchy in dirt cups?
If you like a crunchy topping, sprinkle cookie crumbs right before serving instead of layering them in advance.
Conclusion
Pumpkin patch dirt cups aren’t just another dessert they’re a celebration of the season. With their playful look and rich, chocolatey taste, they bring joy to kids and adults alike. Best of all, they’re quick, affordable, and customizable, making them a perfect choice for busy families and party hosts.
The next time you’re planning a fall celebration, try this pumpkin patch dirt cups recipe. It’s simple, festive, and guaranteed to put a smile on everyone’s face.
The Best Pumpkin Patch Dirt Cups for Fall Parties
Ingredients
- Base & Layers:
- 2 3.9 oz boxes instant chocolate pudding mix
- 3 cups cold milk for pudding
- 1 package Oreo cookies crushed (about 30 cookies)
- Decorations:
- Candy pumpkins mellowcreme or pumpkin gummies
- Green frosting store-bought or homemade or melted green candy melts
- Optional:
- Gummy worms
- Halloween sprinkles
- Crushed pretzels
- Candy eyes
- Serving Tools:
- 8–10 clear plastic cups or dessert jars
- Small spoons
Instructions
- Make the Pudding
- In a large bowl, whisk together pudding mix and cold milk until smooth.
- Let set in the fridge for 5–10 minutes to thicken.
- Crush the Cookies
- Place Oreos in a zip-top bag and crush with a rolling pin until crumbly but not too fine.
- Layer the Cups
- Spoon a layer of pudding into each cup.
- Add a layer of crushed cookies.
- Repeat layers until the cup is nearly full, ending with crushed Oreos on top.
- Decorate the Pumpkin Patch
- Gently press candy pumpkins into the cookie “dirt.”
- Use green frosting to pipe vines and leaves.
- Add extras like worms, eyes, or pretzels for a festive touch.
Notes
- Best Served Fresh: Assemble cups the day of your event, but add decorations just before serving.
- Customize It: Use different pudding flavors, crushed brownies, or gluten-free cookies.
- Kid-Friendly Tip: Let children help decorate their own pumpkin patch.
- Lighten It Up: Mix pudding with whipped cream for a fluffier texture.