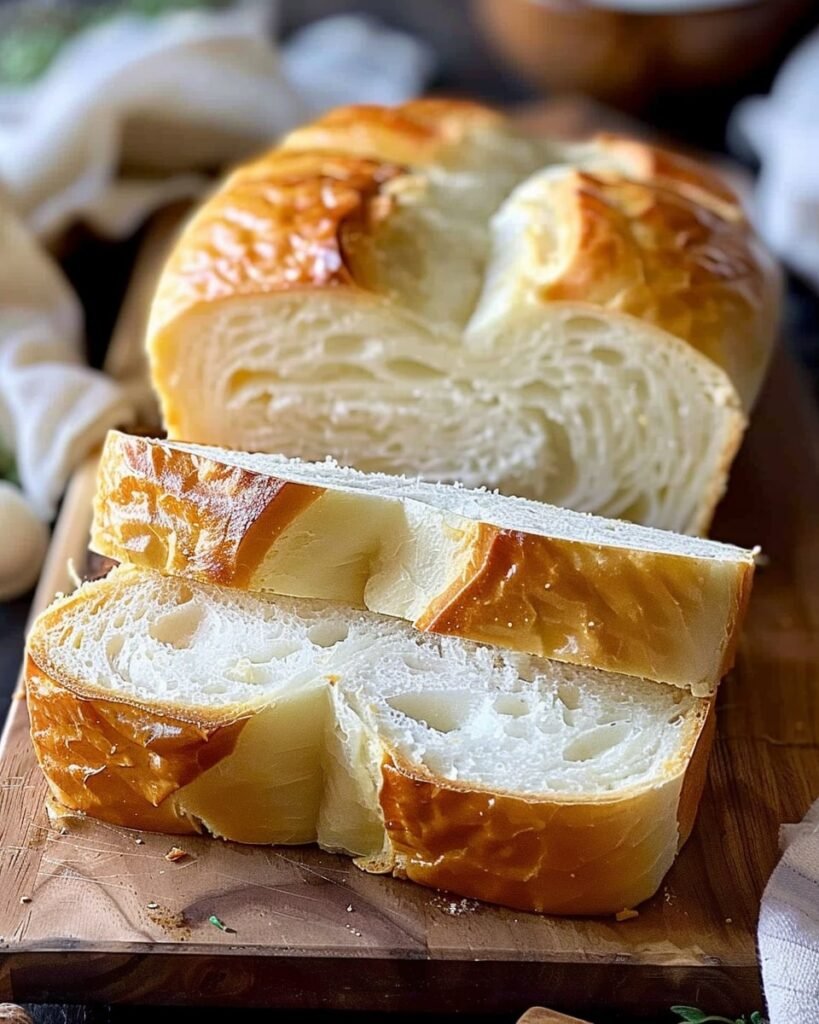
Homemade White Bread for Beginners

There’s something magical about baking bread from scratch. The way your kitchen fills with the comforting aroma of freshly baked dough, the soft crackle of the crust as it cools, and that first warm slice slathered with butter it’s pure joy.
If you’ve always dreamed of baking your own bread but felt intimidated by the process, you’re not alone. Many people believe bread baking is complicated, but here’s the truth making homemade white bread is much easier than you think. And once you’ve tried it, you might never go back to store-bought loaves again.
This beginner-friendly guide will walk you through every step so you can confidently bake a perfect, fluffy loaf that tastes like it came straight from a bakery.
Why You’ll Love This Homemade White Bread Recipe
It’s Easier Than You Think
You don’t need a fancy mixer, special pans, or years of baking experience. Just a few simple ingredients, your hands, and a little patience.
This bread recipe is straightforward — no complicated techniques or confusing terms. You’ll mix, knead, rise, and bake your way to a loaf that’s golden, soft, and incredibly satisfying.
It Tastes So Much Better
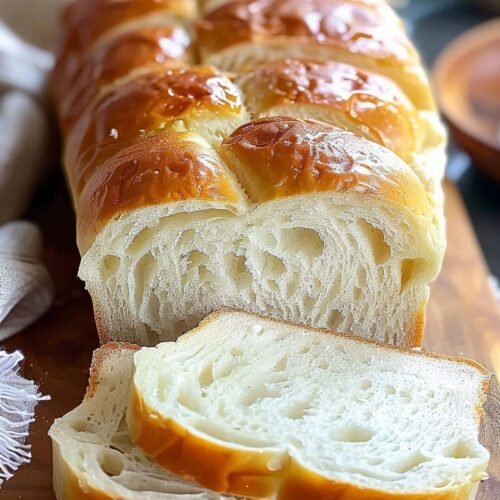
Homemade bread has a flavor that no packaged loaf can match. The crust is lightly crisp, the inside pillowy and tender, and every bite carries the warmth of something made with care.
And because you’re in control, there are no preservatives or additives — just wholesome, real ingredients.
It’s the Perfect Starter Recipe
If you’ve never baked bread before, this is the best recipe to start with. It’s forgiving, foolproof, and teaches you the basics of bread-making — skills you’ll use again and again for years to come.
Ingredients You’ll Need for Homemade White Bread
Making your own bread only takes a handful of pantry staples:
-
Flour: All-purpose or bread flour both work great. Bread flour gives a slightly chewier texture, while all-purpose makes it softer.
-
Warm water: It should feel like a warm bath (around 110°F or 43°C). Too hot, and it kills the yeast; too cold, and it won’t activate.
-
Yeast: Active dry yeast or instant yeast both work. Just make sure it’s fresh.
-
Sugar: Feeds the yeast and adds a subtle sweetness.
-
Salt: Balances flavor.
-
Butter or oil: Adds richness and softness.
That’s it — simple, humble ingredients that come together beautifully.
How to Make Homemade White Bread (Step-by-Step)
Step 1: Activate the Yeast
Start by mixing warm water, sugar, and yeast in a bowl. Let it sit for 5 to 10 minutes until it looks foamy. This tells you the yeast is alive and ready to work its magic.
If it doesn’t foam, your yeast may be old or the water too hot. Just try again — it’s worth getting right.
Step 2: Make the Dough
Add flour, salt, and melted butter to your yeast mixture. Stir with a spoon until it starts to form a sticky dough.
When it becomes too thick to stir, use your hands to bring it together into a soft ball.
Step 3: Knead the Dough
Lightly flour your counter and knead the dough for about 8 to 10 minutes. You’re looking for a smooth, stretchy texture.
To test if it’s ready, stretch a small piece between your fingers — if it forms a thin “windowpane” without tearing, you’ve nailed it.
Step 4: Let It Rise
Place the dough in a lightly greased bowl, cover it with a damp towel, and let it rise for about an hour — or until it doubles in size.
This is where the yeast does its job, creating that soft, airy texture inside the bread.
Step 5: Shape the Loaf
Gently punch down the dough to release extra air. Roll it into a rectangle, then fold and tuck it into a loaf shape. Place it in a greased bread pan.
Step 6: Second Rise
Cover again and let it rise for another 30–45 minutes. You’ll know it’s ready when it has puffed up and fills the pan nicely.
Step 7: Bake
Preheat your oven to 375°F (190°C). Bake the bread for 25–30 minutes, until the top is golden brown and the loaf sounds hollow when tapped on the bottom.
The smell at this point? Absolutely irresistible.
Step 8: Cool and Slice
This is the hardest part — waiting. Let your loaf cool for at least 20 minutes before slicing. It allows the crumb to set and keeps the inside soft and fluffy.

Helpful Tips for Perfect Homemade Bread
Even though this recipe is simple, a few small tricks can make your loaf even better:
-
Don’t rush the rise: Let the dough double — it gives the bread better texture and flavor.
-
Use fresh yeast: Expired yeast won’t rise well.
-
Add steam: Place a small pan of water in the oven for a soft crust.
-
Brush with butter: For a shiny, tender finish, brush melted butter over the top as soon as it comes out of the oven.
Variations You Can Try
Once you’ve mastered the basic recipe, get creative:
-
Honey Butter Bread: Add 2 tablespoons of honey for a slightly sweet loaf.
-
Garlic Herb Bread: Mix in garlic powder, dried herbs, and olive oil for a savory twist.
-
Whole Wheat Version: Replace half the white flour with whole wheat for a heartier bread.
-
Cheesy Loaf: Add shredded cheddar to the dough for a rich, cheesy aroma.
Storage and Freezing Tips
Homemade bread tastes best fresh, but you can easily store or freeze it:
-
Room temperature: Keep in an airtight bag or bread box for up to 4 days.
-
Freezer: Slice before freezing so you can toast individual pieces later. Wrap in plastic, then foil, and freeze for up to 3 months.
-
Reheating: Pop a slice in the toaster or warm the whole loaf in the oven at 300°F (150°C) for 10 minutes.
Why Homemade Bread is Worth It
When you bake your own bread, you’re not just making food — you’re creating something meaningful. The act of kneading dough, watching it rise, and pulling a golden loaf from the oven brings a sense of peace and accomplishment that few store-bought foods can match.
It’s healthier, fresher, and full of love — and once you experience it, you’ll understand why so many people fall in love with baking.
Frequently Asked Questions
Why didn’t my bread rise?
It’s usually because the yeast wasn’t active. Check that your water is warm but not hot and that your yeast is fresh.
Can I make this without a mixer?
Absolutely. This recipe is designed for hand-kneading — it’s a little workout, but the result is worth it.
How do I make my bread softer?
Use milk instead of water and add a little extra butter. Also, cover your loaf with a towel as it cools to keep the crust soft.
Can I prepare the dough ahead of time?
Yes. After the first rise, refrigerate it overnight. Just let it come to room temperature before baking.
How can I tell when it’s done baking?
The top should be golden brown and the loaf should sound hollow when tapped. You can also check with a thermometer — it should read around 190°F (88°C) inside.
Conclusion
Baking your first loaf of Homemade White Bread is more than just following a recipe it’s an experience. You’ll learn to trust your senses, your hands, and your patience. And when that warm loaf comes out of the oven, you’ll feel the pride that comes from creating something from scratch.
Homemade White Bread for Beginners
Ingredients
- 3 cups all-purpose flour or bread flour
- 1 cup warm water about 110°F / 43°C
- 2 ¼ tsp active dry yeast 1 packet
- 2 tbsp sugar
- 1 tsp salt
- 2 tbsp butter or oil plus extra for brushing
Instructions
- Activate Yeast: In a large bowl, combine warm water, sugar, and yeast. Let it sit for 5–10 minutes until foamy.
- Make the Dough: Add flour, salt, and melted butter. Stir until the dough comes together.
- Knead: Transfer to a floured surface and knead for 8–10 minutes, until smooth and elastic.
- First Rise: Place the dough in a greased bowl, cover, and let it rise for 1 hour or until doubled in size.
- Shape: Punch down the dough, roll into a loaf shape, and place in a greased bread pan.
- Second Rise: Cover and let it rise for 30–45 minutes, until puffy.
- Bake: Preheat oven to 375°F (190°C). Bake for 25–30 minutes, until golden and hollow-sounding when tapped.
- Cool: Brush with melted butter, then cool for at least 20 minutes before slicing.
Notes
- Make sure your yeast foams if not, the yeast may be expired or water too hot.
- Add a pan of water to the oven for a softer crust.
- Brush the top with melted butter right after baking for extra flavor and shine.
- For softer bread, substitute milk for water.