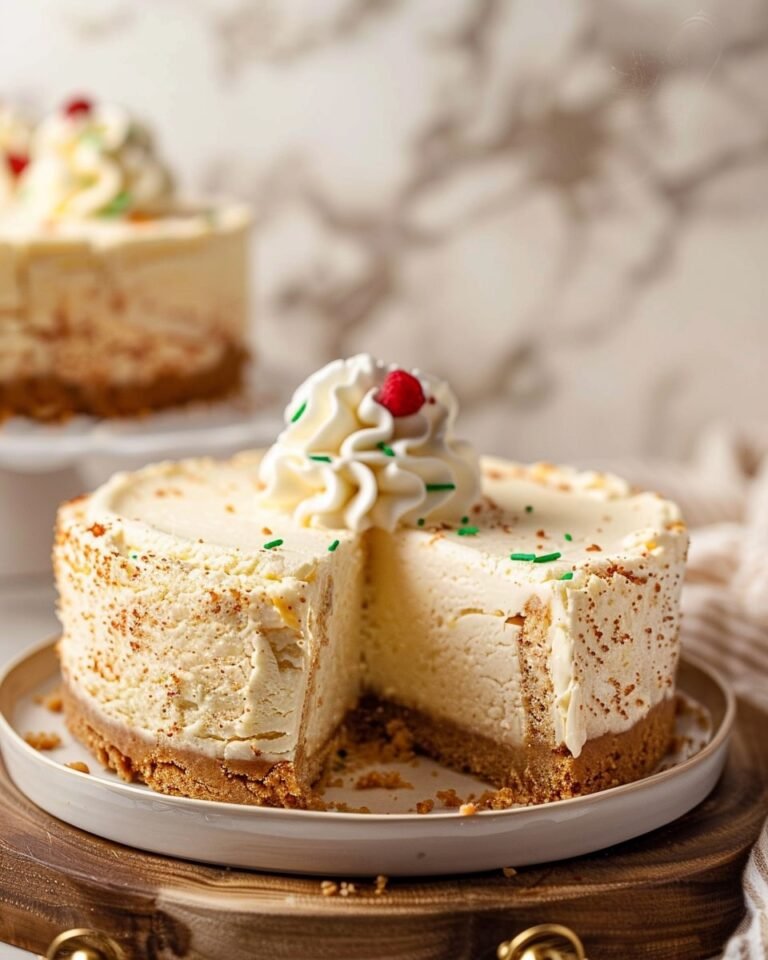
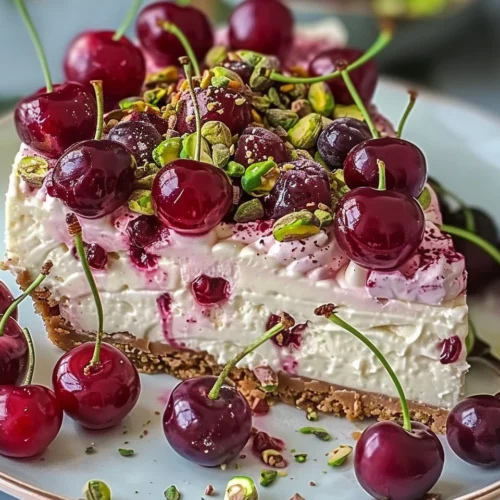
Cherry Pistachio Cheesecake
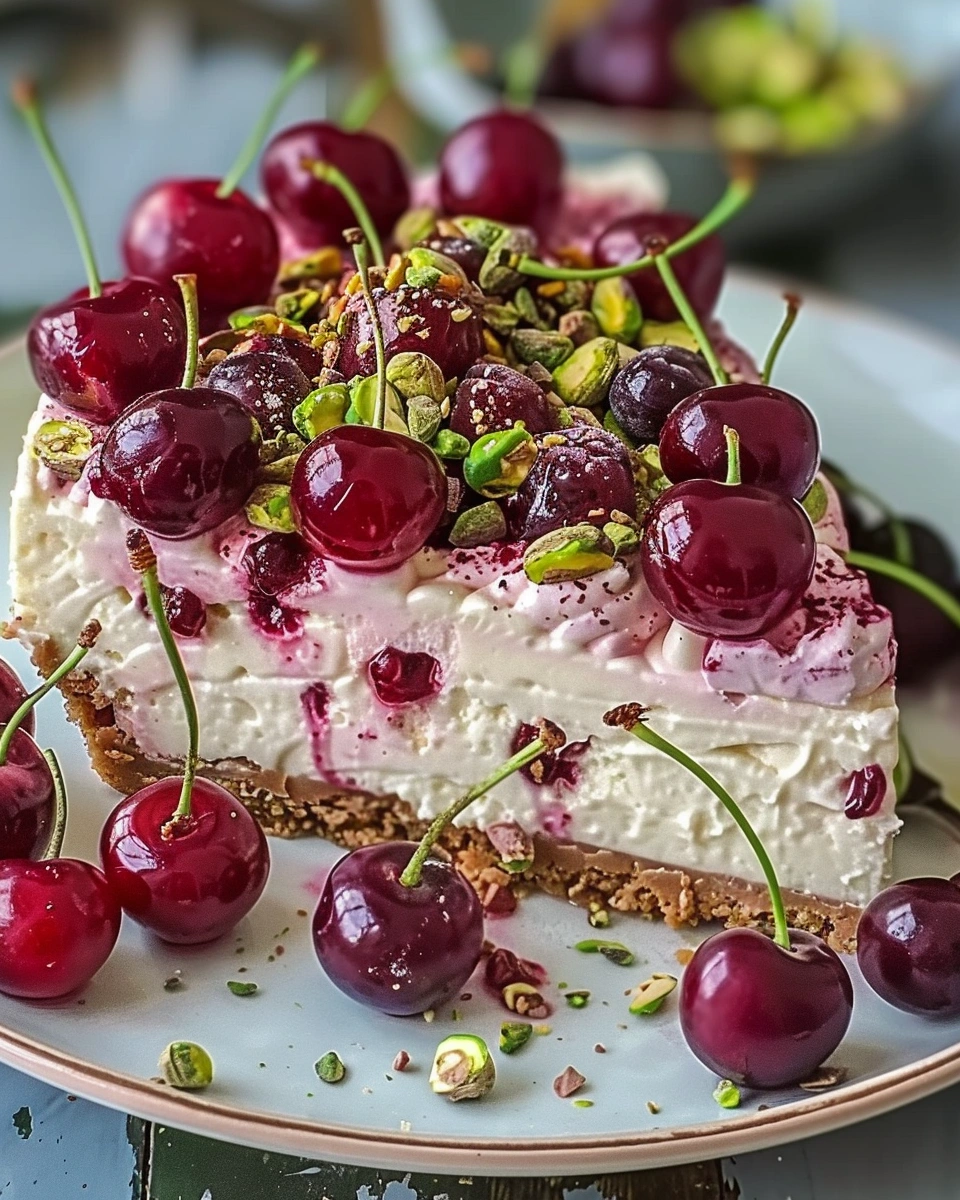
Looking for a dessert that feels elegant but tastes comforting and rich? This Cherry Pistachio Cheesecake is creamy, slightly nutty, and topped with sweet, glossy cherries. It’s the kind of dessert that looks impressive on a table but is surprisingly simple to make.
Sometimes cheesecakes can turn out cracked or too dense. Not this one. The smooth cream cheese filling blends beautifully with crunchy pistachios, while the cherry topping adds the perfect balance of sweetness and color.
I’ve made this Cherry Pistachio Cheesecake for holidays, birthdays, and special gatherings, and it never disappoints. In this post, you’ll learn exactly how to make it step-by-step, plus pro tips, variations, and storage advice to get perfect results every time.
Let’s bake something special.
Why You’ll Love This Recipe
-
Creamy and smooth texture – Rich but not heavy.
-
Nutty pistachio flavor – Subtle crunch and depth.
-
Beautiful cherry topping – Sweet and vibrant.
-
Perfect for celebrations – Elegant presentation.
-
Make-ahead friendly – Even better the next day.
Cherry pistachio cheesecake is a show-stopping dessert.
Ingredients & Prep
This is a baked cheesecake with a nutty crust and fruity topping.
Main Ingredients Prep
For the crust:
-
1 ½ cups graham cracker crumbs
-
½ cup finely chopped pistachios
-
¼ cup granulated sugar
-
½ cup unsalted butter, melted
For the filling:
-
24 ounces cream cheese, softened
-
1 cup granulated sugar
-
3 large eggs, room temperature
-
½ cup sour cream
-
1 teaspoon vanilla extract
-
½ teaspoon almond extract
-
½ cup finely ground pistachios
For the topping:
-
1 ½ cups cherry pie filling
-
Extra chopped pistachios for garnish
Prep Tips:
-
Let cream cheese and eggs sit at room temperature.
-
Finely grind pistachios for smooth texture.
-
Preheat oven to 325°F.
-
Line the bottom of a 9-inch springform pan with parchment paper.
Seasonings, Sauces, or Flavor Base
-
Vanilla enhances creaminess.
-
Almond extract boosts pistachio flavor.
-
Sour cream adds smooth texture.
These elements make cherry pistachio cheesecake rich and balanced.
Pantry Staples
-
Springform pan
-
Electric mixer
-
Mixing bowls
-
Rubber spatula
Simple tools create stunning results.
Step-by-Step Cooking Instructions
Pre-Cooking Prep
-
Preheat oven to 325°F.
-
Grease springform pan lightly.
Making the Crust
-
In a bowl, mix graham crumbs, chopped pistachios, sugar, and melted butter.
-
Press mixture firmly into bottom of pan.
-
Bake for 8–10 minutes.
-
Let cool while preparing filling.
Making the Filling
-
Beat softened cream cheese until smooth.
-
Add sugar and mix until creamy.
-
Add eggs one at a time, mixing gently.
-
Stir in sour cream, vanilla, almond extract, and ground pistachios.
-
Mix until just combined.
Avoid overmixing to prevent cracks.
Baking the Cheesecake
-
Pour filling over cooled crust.
-
Smooth top.
-
Bake for 55–65 minutes, until edges are set and center slightly jiggles.
-
Turn off oven and leave door slightly open for 1 hour.
Cooling & Chilling
-
Remove from oven.
-
Cool completely at room temperature.
-
Refrigerate for at least 4 hours or overnight.
Chilling helps the cherry pistachio cheesecake set properly.
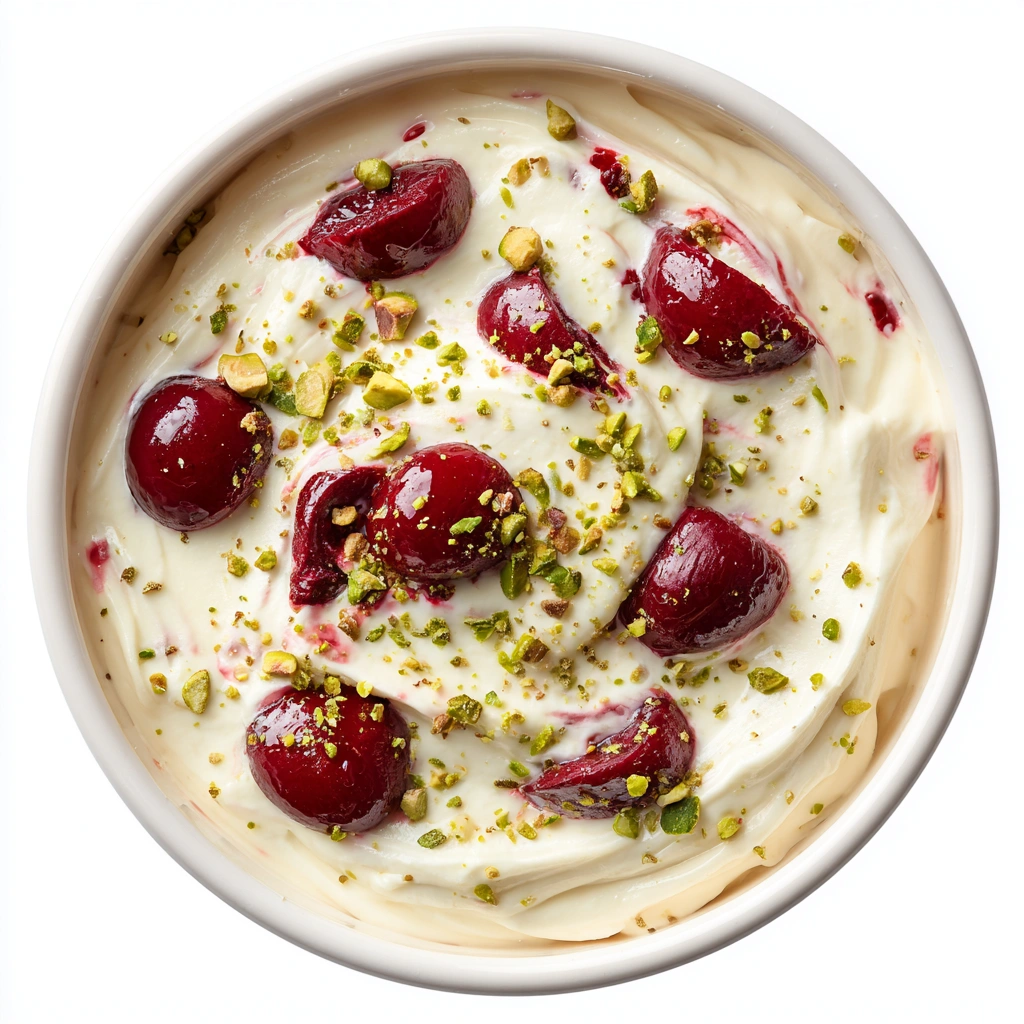
Adding the Topping
-
Spoon cherry pie filling over chilled cheesecake.
-
Sprinkle extra chopped pistachios on top.
Slice with a warm knife for clean cuts.
Pro Tips for Perfect Results
Common Mistakes to Avoid
-
Cold cream cheese – Causes lumps.
-
Overmixing – Adds too much air and causes cracks.
-
Skipping chill time – Cheesecake won’t set properly.
-
Overbaking – Leads to dry texture.
Recommended Tools
-
Springform pan
-
Hand or stand mixer
-
Offset spatula
-
Sharp knife
These tools help create smooth cherry pistachio cheesecake.
Storage & Reheating Tips
Store in refrigerator for up to 5 days.
Cover tightly to prevent drying out.
To freeze:
-
Wrap slices individually.
-
Freeze up to 2 months.
-
Thaw overnight in refrigerator.
Cheesecake is best served chilled.
Flavor Variations
Cherry pistachio cheesecake can be customized easily.
Spicy Version
Add warmth with:
-
Pinch of cinnamon in crust.
-
Tiny dash of cardamom in filling.
These spices complement pistachio beautifully.
Healthy / Special Diet Option
To lighten:
-
Use reduced-fat cream cheese.
-
Replace part of sugar with monk fruit sweetener.
-
Use Greek yogurt instead of sour cream.
For gluten-free:
-
Use gluten-free graham crackers.
Global Flavor Twist
Try something creative:
-
Add rose water for Middle Eastern flair.
-
Top with fresh cherries instead of pie filling.
-
Add white chocolate drizzle.
-
Mix in orange zest for citrus brightness.
You can even swirl cherry compote into the batter before baking.
Serving Suggestions
Cherry pistachio cheesecake is perfect for special occasions.
Pair With
-
Fresh berries
-
Whipped cream
-
Coffee
-
Espresso
Drinks
Serve with:
-
Hot coffee
-
Cappuccino
-
Herbal tea
-
Sparkling water
It’s an elegant dessert for holidays and celebrations.
FAQs
Can I make this ahead of time?
Yes! Cherry pistachio cheesecake is ideal for making a day ahead. It tastes even better after chilling overnight.
How do I fix common mistakes?
Cheesecake cracked?
Cover with cherry topping — it hides cracks beautifully.
Too soft?
Chill longer before slicing.
Too dense?
Avoid overmixing and overbaking next time.
Conclusion
If you’re looking for a dessert that’s creamy, nutty, and beautifully topped with sweet cherries, this Cherry Pistachio Cheesecake is the perfect choice. It’s rich, elegant, and surprisingly easy to make at home.
Whether for holidays, birthdays, or dinner parties, it’s a dessert that truly impresses. Once you try it, you’ll want to make it again and again.
If you loved this recipe, you might also enjoy pistachio cake or classic cherry cheesecake next.
Cherry Pistachio Cheesecake
Ingredients
- For the Crust:
- 1 ½ cups graham cracker crumbs
- ½ cup finely chopped pistachios
- ¼ cup granulated sugar
- ½ cup unsalted butter melted
- For the Filling:
- 24 ounces cream cheese softened
- 1 cup granulated sugar
- 3 large eggs room temperature
- ½ cup sour cream
- 1 teaspoon vanilla extract
- ½ teaspoon almond extract
- ½ cup finely ground pistachios
- For the Topping:
- 1 ½ cups cherry pie filling
- Extra chopped pistachios for garnish
Instructions
- Prep
- Preheat oven to 325°F (165°C).
- Lightly grease a 9-inch springform pan.
- Line the bottom with parchment paper.
- Make the Crust
- Mix graham cracker crumbs, chopped pistachios, sugar, and melted butter.
- Press firmly into the bottom of the pan.
- Bake for 8–10 minutes.
- Remove and let cool.
- Make the Filling
- Beat softened cream cheese until smooth.
- Add sugar and mix until creamy.
- Add eggs one at a time, mixing gently after each addition.
- Stir in sour cream, vanilla extract, almond extract, and ground pistachios.
- Mix until just combined (do not overmix).
- Bake
- Pour filling over cooled crust.
- Smooth the top.
- Bake for 55–65 minutes, until edges are set and center slightly jiggles.
- Turn off oven and leave door slightly open for 1 hour.
- Cool & Chill
- Remove cheesecake from oven.
- Cool completely at room temperature.
- Refrigerate for at least 4 hours or overnight.
- Add Topping
- Spread cherry pie filling over chilled cheesecake.
- Sprinkle with chopped pistachios.
- Slice using a warm knife for clean cuts.
Notes
- Ensure cream cheese and eggs are at room temperature.
- Avoid overmixing to prevent cracks.
- Chill fully before slicing for best texture.
- Store covered in refrigerator up to 5 days.
- Freeze slices individually for up to 2 months.