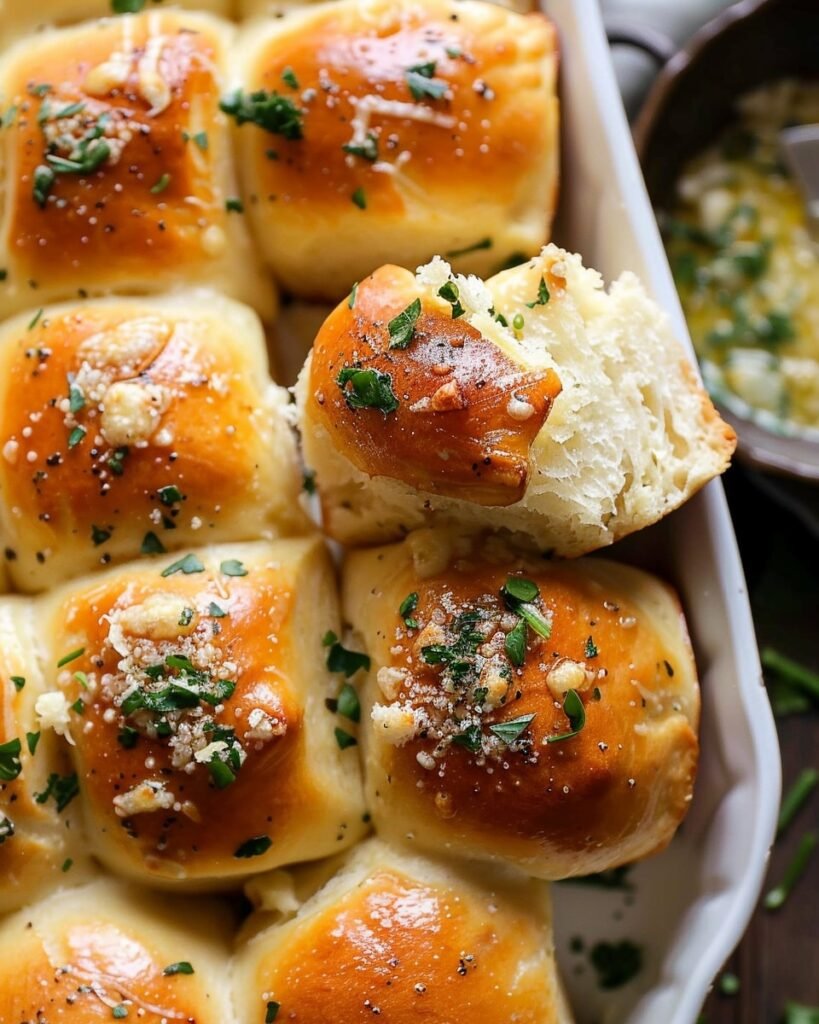
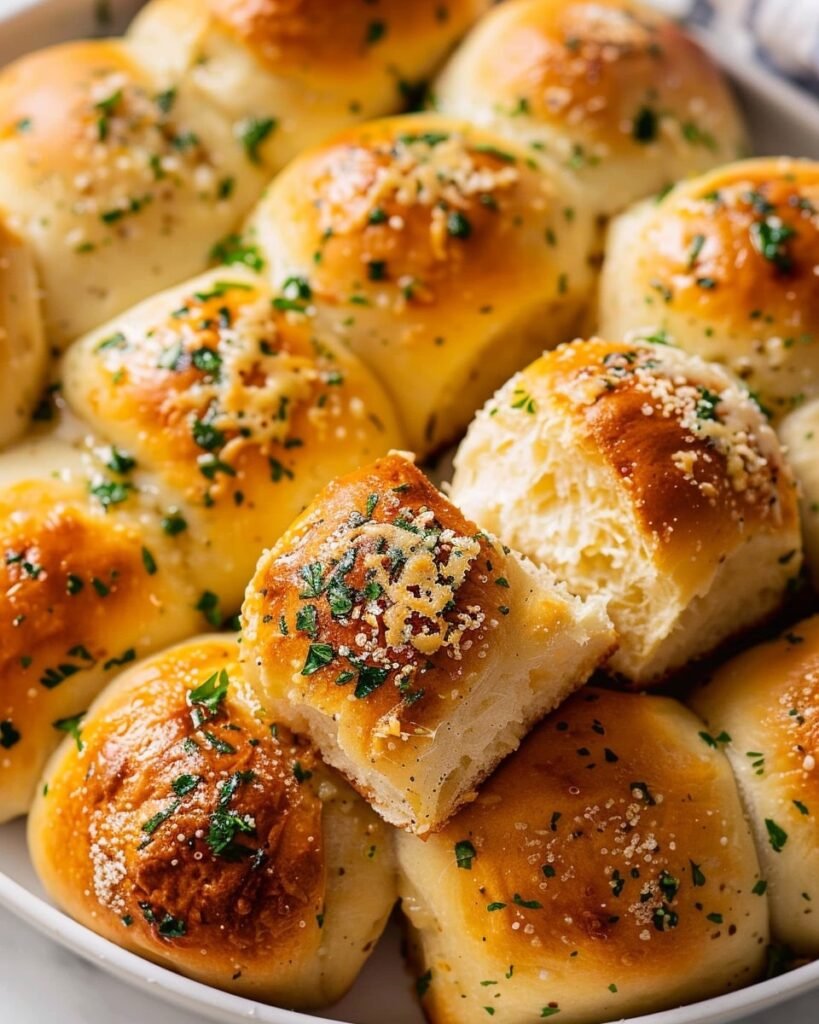
Irresistible Garlic Bread Rolls
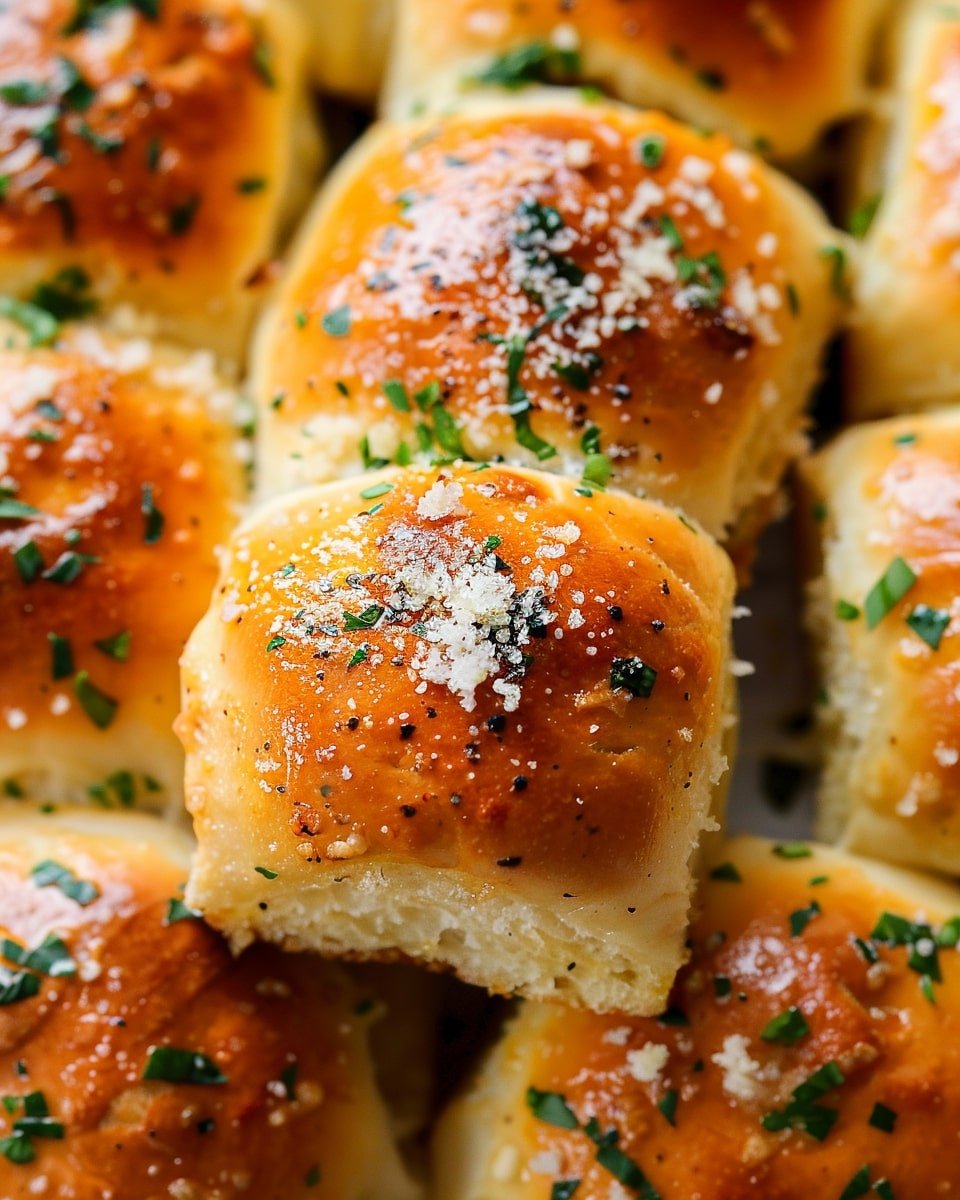
Garlic Bread Rolls have that kind of pull. They’re soft, golden, and bursting with flavor in every bite. Whether you’re serving them with pasta, soup, or enjoying them on their own, these rolls bring a touch of comfort and warmth to any meal.
If you’ve ever wanted to bake garlic rolls that taste like they came straight from a bakery, you’re in the right place. This guide walks you through every step, from kneading the dough to brushing on that final buttery glaze, helping you master a recipe that’s as easy as it is irresistible.
What Makes Garlic Bread Rolls So Irresistible
What makes these rolls so special isn’t just their taste — it’s the way they make you feel. You take one bite, and suddenly, everything slows down. The crisp edges give way to a soft, fluffy center, while the buttery garlic melts across your tongue.
The Perfect Blend of Texture and Flavor
The best Garlic Bread Rolls have two things working in harmony — a light, airy interior and a golden, slightly crisp exterior. The butter and garlic seep into every layer, creating a rich, savory depth that pairs beautifully with nearly any dish.
Why Homemade Always Wins
Sure, you can buy ready-made garlic bread from the store, but it’s never quite the same. When you bake your own, your kitchen fills with the irresistible scent of rising dough and roasted garlic. Plus, you get to control the ingredients — more butter, extra garlic, or maybe a sprinkle of Parmesan if you’re feeling fancy.
Homemade rolls also let you shape them however you like — small dinner rolls, twisted knots, or even pull-apart bread. Every batch is yours to customize.

Ingredients for Irresistible Garlic Bread Rolls
The Foundation — The Dough
-
Flour: Use all-purpose or bread flour for a soft yet sturdy structure.
-
Yeast: Helps the rolls rise and gives them their fluffy texture.
-
Milk: Adds richness and softness to the dough.
-
Butter: Infuses the bread with moisture and tenderness.
-
Sugar & Salt: Sugar feeds the yeast, while salt enhances flavor and balances the sweetness.
The Star — Garlic Butter Mixture
No garlic bread is complete without a buttery glaze. To make it, combine:
-
Fresh minced garlic
-
Melted butter
-
Chopped parsley or Italian herbs
-
A pinch of salt
Optional add-ons include Parmesan, mozzarella, or even a touch of olive oil for extra shine.
Pro Tip: Always use fresh garlic, not pre-minced from a jar. Freshly minced garlic has a stronger aroma and cleaner flavor.
How to Make Garlic Bread Rolls Step-by-Step
Once you’ve gathered your ingredients, the process is straightforward — and the results are worth every minute.
Step 1 – Prepare the Dough
Start by activating your yeast. Mix it into warm milk with a bit of sugar and let it sit for a few minutes until it starts to bubble. This means your yeast is alive and ready to go.
Next, mix in your flour, butter, and salt. Knead the dough until it becomes smooth and elastic. Cover it with a damp towel and let it rest in a warm place until it doubles in size.
Step 2 – Shape the Rolls
Punch down the dough gently to release the air. Divide it into equal pieces and roll them into smooth balls. Arrange them in a greased baking dish, leaving a little space between each roll so they can rise again.
Step 3 – Make the Garlic Butter
While your dough rests, melt butter in a small pan. Stir in minced garlic and chopped herbs. Let it sit for a few minutes to allow the flavors to infuse.
Step 4 – Bake
Brush half of the garlic butter mixture over the unbaked rolls. Bake at 375°F (190°C) for about 15–18 minutes, or until the tops are golden brown and fragrant.
Step 5 – Finish with More Butter
As soon as they come out of the oven, brush the warm rolls with the remaining garlic butter. The butter will soak into the bread, making it even softer and more flavorful.
Quick Tips:
-
Don’t rush the dough’s resting time — good bread takes patience.
-
For extra flavor, sprinkle grated Parmesan or sea salt before baking.
-
To keep rolls extra soft, cover them with a towel as they cool.
Tips for the Softest, Most Flavorful Garlic Bread Rolls
Getting that bakery-level softness is easier than you think — it just takes a few mindful steps.
-
Use warm liquids: Cold milk or water can slow yeast activation. Warm (not hot) ingredients help the dough rise properly.
-
Don’t over-knead: Knead until smooth, but stop before the dough becomes tough.
-
Let the dough rest fully: The longer it rests, the lighter your rolls will be.
-
Brush generously: A thick layer of garlic butter before and after baking locks in flavor and keeps the crust tender.
Delicious Variations of Garlic Bread Rolls
If you love experimenting in the kitchen, Garlic Bread Rolls are a perfect canvas for creativity.
Cheesy Garlic Bread Rolls
Stuff each dough ball with mozzarella or cheddar before baking. When you pull them apart, you’ll get that irresistible cheese stretch.
Herb-Infused Rolls
Mix dried rosemary, thyme, or oregano into your dough for an aromatic twist.
Garlic Knots
Shape the dough into small ropes, tie them into knots, and brush with garlic butter. They’re perfect as a side or appetizer.
Vegan or Whole Wheat Version
Use plant-based butter and milk for a vegan-friendly recipe. Whole wheat flour can be used for a nuttier flavor and extra fiber.
Serving Ideas — What to Pair With Garlic Bread Rolls
These rolls are so versatile that they can complement almost any meal.
With Classic Italian Dishes
Pair them with pasta dishes like spaghetti carbonara, lasagna, or creamy chicken Alfredo. They soak up sauces beautifully.
As Appetizers or Party Snacks
Mini garlic rolls make a great addition to your party spread. Serve them with marinara or ranch dip.
With Soups and Salads
Try them alongside tomato soup, creamy mushroom soup, or a crisp Caesar salad. The combination is always a hit.
How to Store and Reheat Garlic Bread Rolls
Freshly baked rolls are best enjoyed warm, but you can easily save leftovers for later.
-
Storage: Keep them in an airtight container at room temperature for two days. For longer storage, refrigerate for up to five days.
-
Freezing: Wrap rolls individually in foil or plastic wrap, then freeze for up to two months.
-
Reheating: Warm them in the oven at 300°F (150°C) for 5–7 minutes, or microwave briefly with a damp paper towel to maintain softness.
Pro Tip: After reheating, brush them again with melted garlic butter to refresh the flavor.
Nutritional Overview (Per Roll)
-
Calories: ~150
-
Carbs: 20–25g
-
Protein: 4–6g
-
Fat: 5–8g
(Values vary depending on ingredients used.)
Frequently Asked Questions
Can I use pre-made dough?
Yes, pre-made or frozen dough works fine. Just thaw it, shape it, and brush it with garlic butter before baking.
How do I make them extra soft?
Use milk instead of water and don’t over-bake them. Covering the rolls with a towel right after baking traps steam, keeping them pillowy soft.
Can I prepare them ahead of time?
Absolutely. Shape the rolls, cover the tray, and refrigerate overnight. Bake them the next day for freshly baked goodness.
What’s the best way to keep rolls warm for serving?
Wrap them in foil and place them in a warm oven (around 200°F / 90°C) until ready to serve.
Can I make spicy garlic bread rolls?
Yes! Add a pinch of chili flakes or cayenne pepper to your garlic butter for a hint of heat.
Conclusion
Garlic Bread Rolls are proof that the simplest recipes can bring the most joy. The smell of garlic and butter, the warmth of fresh bread, the way everyone reaches for one more roll — it’s pure comfort.

Irresistible Garlic Bread Rolls
Ingredients
- For the Dough:
- 3 cups all-purpose flour or bread flour
- 2 ¼ tsp active dry yeast 1 packet
- 1 cup warm milk about 110°F / 43°C
- 2 tbsp sugar
- 3 tbsp melted butter
- 1 tsp salt
- For the Garlic Butter:
- 4 tbsp unsalted butter melted
- 3 cloves garlic minced
- 1 tbsp chopped fresh parsley or 1 tsp dried
- Pinch of salt
- Optional Add-Ins:
- 2 tbsp grated Parmesan cheese
- ½ cup shredded mozzarella for cheesy rolls
- ½ tsp red pepper flakes for a spicy kick
Instructions
- Activate the Yeast:
- In a small bowl, mix warm milk and sugar. Stir in yeast and let it sit for 5–10 minutes, until foamy.
- Make the Dough:
- In a large mixing bowl, combine flour, salt, and melted butter. Add the yeast mixture and knead until a soft, elastic dough forms. Cover and let rise for about 1 hour, or until doubled in size.
- Shape the Rolls:
- Punch down the dough and divide it into 12 equal pieces. Shape each into a smooth ball and place on a greased baking pan, leaving space between them. Cover and let rise again for 30 minutes.
- Make the Garlic Butter:
- Melt butter in a small pan. Add minced garlic, parsley, and a pinch of salt. Let it sit for 5 minutes to infuse.
- Bake the Rolls:
- Preheat oven to 375°F (190°C). Brush half of the garlic butter mixture over the rolls and bake for 15–18 minutes, or until golden brown.
- Finish and Serve:
- Brush with the remaining garlic butter immediately after baking. Serve warm and enjoy!
Notes
- Always use fresh garlic for the best flavor.
- Don’t skip the second rise it makes the rolls soft and fluffy.
- Brush with butter before and after baking for that perfect glossy finish.
- Add cheese or herbs for fun flavor twists.
- Store leftovers in an airtight container up to 2 days at room temp or freeze up to 2 months.