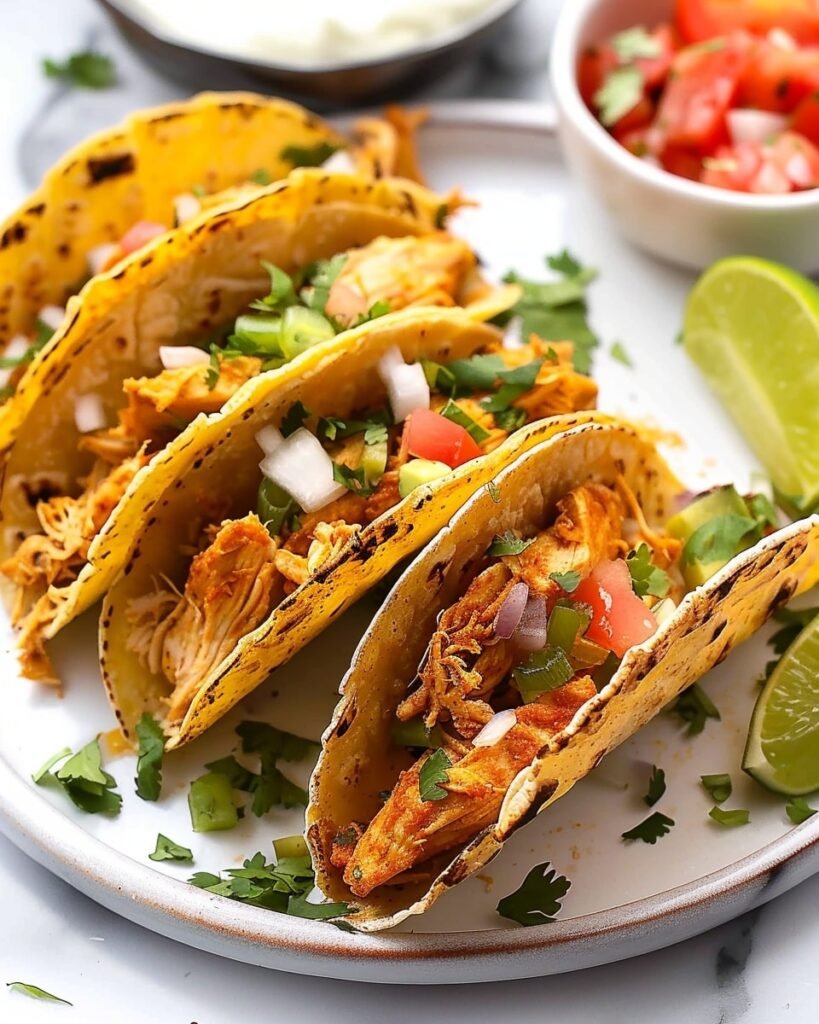
Mini Baked Chicken Tacos

Mini Baked Chicken Tacos bring all the flavor and fun of traditional tacos but in a smaller, crispier, and easier-to-serve form. Whether you’re hosting a get-together, planning a family dinner, or simply craving something quick yet delicious, these little tacos hit every note — flavor, texture, and simplicity.
This guide will show you exactly how to make your own batch of irresistible mini tacos right in your oven no frying, no fuss, just pure, golden perfection.
Why You’ll Love Mini Baked Chicken Tacos
Bite-Sized Goodness That Fits Any Occasion
Mini tacos are a joy to eat and even more fun to serve. Their size makes them perfect for parties, game nights, potlucks, or even as a quick weeknight dinner. You can set them out on a tray, and they disappear in minutes. Plus, they’re neat, easy to hold, and loved by both kids and adults.
Healthier Than Fried Versions
Unlike traditional fried tacos, baking gives you that crisp, golden texture without soaking up extra oil. You get all the crunch with far fewer calories. If you’re trying to make lighter choices without sacrificing taste, oven baking is the way to go. You can also use lean chicken breast and fresh ingredients to keep things wholesome and satisfying.
Customizable to Fit Every Taste
You can fill these mini tacos any way you like — spicy, creamy, cheesy, or loaded with veggies. If you’re cooking for a crowd, make a few variations and let everyone pick their favorite. It’s a meal that adapts to every craving and dietary preference with ease.
Ingredients You’ll Need for Mini Baked Chicken Tacos
The Basics
To make the best mini tacos, you don’t need anything fancy — just a few simple ingredients that come together beautifully
-
Shredded chicken (use pre-cooked or rotisserie for convenience)
-
Mini tortillas (corn for crunch or flour for a softer bite)
-
Cheese (cheddar, Monterey Jack, or your favorite blend)
-
Taco seasoning (store-bought or homemade)
-
Olive oil (just a light brush to crisp up the tortillas)
-
Fresh toppings: shredded lettuce, diced tomatoes, avocado, salsa, sour cream, or cilantro
Optional Add-Ons
If you want to make your tacos stand out, try adding:
-
A spoonful of black beans or corn for extra texture
-
Jalapeño slices for heat
-
A squeeze of lime for brightness
-
Dairy-free cheese or gluten-free tortillas for dietary needs
How to Make Mini Baked Chicken Tacos (Step-by-Step)
Step 1 – Prepare the Chicken
Start with cooked chicken. If you’re using leftovers or rotisserie chicken, shred it finely. Toss the chicken in taco seasoning and a touch of lime juice to make it juicy and flavorful. A few minutes in a skillet will warm it up and help the flavors blend.
Step 2 – Assemble the Tacos
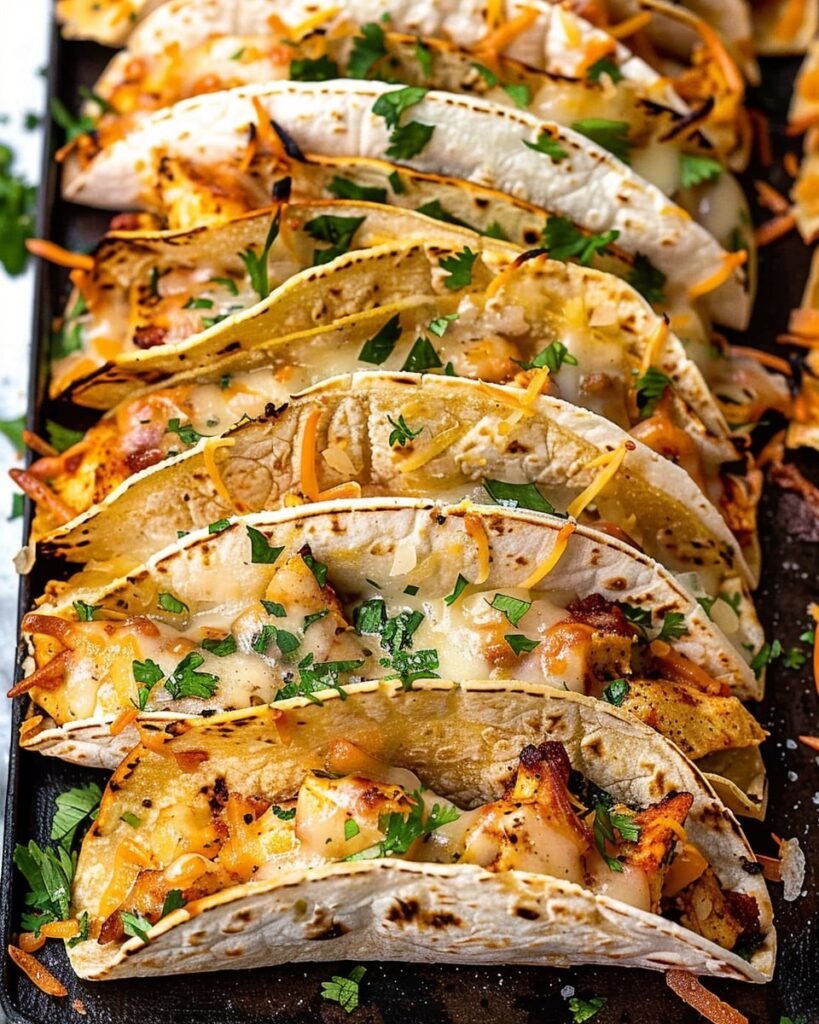
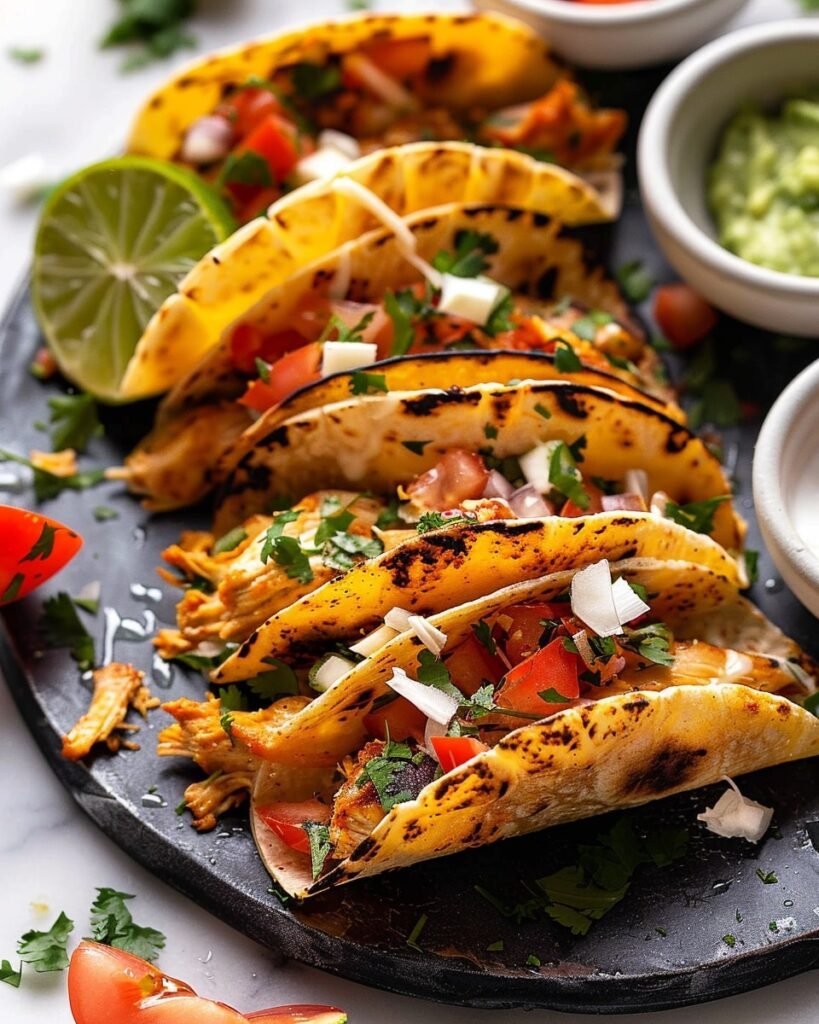
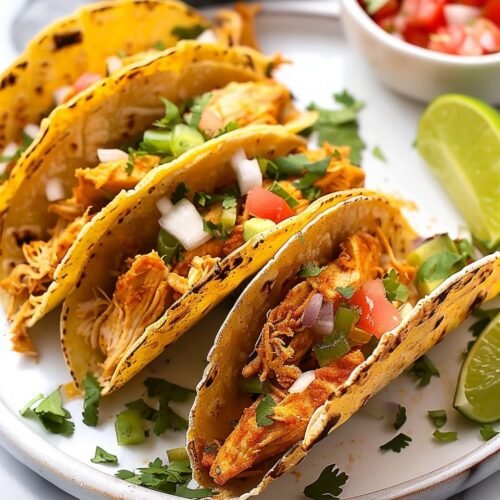
Warm your mini tortillas slightly so they’re soft enough to fold. Spoon a bit of the seasoned chicken onto each one, then sprinkle cheese on top. Fold gently into a half-moon shape and place them in a muffin tin or leaning against the sides of a baking dish — this helps them hold their shape while baking.
Step 3 – Bake Until Golden
Preheat your oven to 400°F (200°C). Lightly brush the tops of the tacos with olive oil for that perfect crisp. Bake for 10 to 12 minutes, flipping once halfway through for even browning. You’ll know they’re done when the edges are golden and the cheese inside is melted and bubbly.
Step 4 – Add Fresh Toppings
Once baked, remove your tacos and let them cool slightly before adding toppings. Fresh ingredients like diced tomatoes, shredded lettuce, avocado, or cilantro add the perfect balance to the warm, cheesy filling. A drizzle of salsa or sour cream takes it up another level.
Tips for Perfect Mini Baked Chicken Tacos
Get the Crunch Right
The secret to perfectly crispy tacos is balance. Don’t overfill them — too much filling can make them soggy. And make sure to brush or spray a little oil on the outside before baking for a golden finish.
Keep Them Warm and Fresh
If you’re serving them for a party, keep the tacos warm by placing them in a low oven (around 200°F or 90°C) until ready to serve. They’ll stay crisp without drying out.
Make-Ahead and Storage Tips
You can easily assemble your tacos ahead of time and refrigerate them for up to a day before baking. If you have leftovers, store them in an airtight container and reheat in the oven for a few minutes to bring back the crunch — skip the microwave to avoid sogginess.
Delicious Variations to Try
If you love experimenting in the kitchen, here are a few fun twists:
-
Spicy Chipotle Chicken Tacos: Mix a spoonful of chipotle sauce into your chicken for a smoky kick.
-
Creamy Ranch Chicken Tacos: Add a drizzle of ranch dressing to the filling before baking for a rich, tangy flavor.
-
Veggie-Loaded Mini Tacos: Replace chicken with sautéed bell peppers, onions, and black beans for a vegetarian-friendly version that’s just as satisfying.
Serving Ideas for Mini Baked Chicken Tacos
Perfect for Parties
Set up a taco platter with different toppings and sauces. These tacos make great appetizers — easy to grab, fun to eat, and guaranteed to impress your guests. Pair them with sides like Spanish rice, guacamole, or Mexican street corn for a full spread.
Family Taco Night
Turn dinner into a build-your-own taco night. Lay out bowls of toppings and let everyone customize their tacos. Kids especially love assembling their own — it’s a great way to make mealtime interactive and stress-free.
Common Mistakes to Avoid
Even simple recipes have a few pitfalls to watch for. Here’s how to keep your tacos perfect every time:
-
Don’t overfill: Too much filling leads to soggy or torn tortillas.
-
Don’t skip the oil: A light coat of oil ensures that golden, crisp texture.
-
Avoid cold ingredients: Warm your filling before assembling so the tacos bake evenly.
FAQs About Mini Baked Chicken Tacos
Can I use leftover chicken for Mini Baked Chicken Tacos?
Absolutely. Leftover grilled, roasted, or rotisserie chicken works perfectly. Just add your taco seasoning to revive the flavor before baking.
How do I make Mini Baked Chicken Tacos ahead of time?
You can assemble the tacos up to 24 hours before baking. Keep them covered in the refrigerator, and bake just before serving for the best results.
Can I freeze Mini Baked Chicken Tacos?
Yes! Once baked and cooled, place them on a tray to freeze individually. Then transfer to a freezer bag. To reheat, bake them straight from frozen until warm and crispy.
What sides go best with Mini Baked Chicken Tacos?
Pair your tacos with Mexican rice, chips and salsa, guacamole, or a refreshing salad. They also taste amazing with a cold drink or fruity mocktail.
Conclusion
Mini Baked Chicken Tacos prove that good things truly come in small packages. They’re crunchy, flavorful, and endlessly adaptable a perfect mix of convenience and comfort. Whether you’re cooking for a crowd or making a simple weeknight dinner, these bite-sized tacos bring everyone to the table with smiles
Mini Baked Chicken Tacos
Ingredients
- 2 cups cooked shredded chicken rotisserie or leftover works great
- 1 tablespoon olive oil
- 2 tablespoons taco seasoning store-bought or homemade
- 12 mini tortillas corn or flour
- 1 cup shredded cheese cheddar, Monterey Jack, or Mexican blend
- Optional toppings: shredded lettuce diced tomatoes, avocado, salsa, sour cream, cilantro, lime wedges
- Optional Add-ins:
- Black beans or corn for extra texture
- Sliced jalapeños for spice
- Dairy-free cheese or gluten-free tortillas for dietary needs
Instructions
- Preheat oven to 400°F (200°C). Lightly grease a muffin tin or baking dish.
- In a skillet, heat olive oil and toss in shredded chicken with taco seasoning until warmed and well-coated.
- Warm tortillas slightly to make them flexible. Spoon chicken and cheese into each, fold gently, and place in the muffin tin or lined up in a baking dish to hold their shape.
- Lightly brush the tops with olive oil. Bake for 10–12 minutes, flipping once halfway through, until golden and crispy.
- Remove from oven and top with your favorite fresh ingredients — lettuce, tomatoes, avocado, salsa, or sour cream. Serve warm.
Notes
- Don’t overfill tacos too much filling can make them soggy.
- For extra crunch, broil for 1–2 minutes after baking.
- Keep warm in a low oven (200°F / 90°C) until ready to serve.
- Store leftovers in an airtight container up to 3 days; reheat in the oven for crispiness.